how to install
My presets are compatible with Adobe Lightroom CC, Lightroom Classic and the Lightroom Mobile app. Choose the app you need installation assistance with:
lightroom classic
installation guide
Installing presets in Lightroom Classic (version 7.3 or later) on Mac or Windows
The following instructions will guide you through the installation for Adobe Lightroom Classic version 7.3 or later which uses the .xmp file format.
1. Download your purchased Presets from the confirmation email which will have a .zip file download link (Download both the Presets and Profiles zip)
2. Open Lightroom, navigate to the Develop Module and click on File -> Import and Develop Profiles and Presets in the top menu.
3. Navigate to where you saved the Presets download and select the two .zip files.
Thats it! All Presets are ready to be used. You will find them in the Presets section on the left.
lightroom cc
installation guide
Installing presets in Lightroom CC on Mac or Windows
The following instructions will guide you through the installation for Adobe Lightroom CC
1. Download your purchased Presets from the confirmation email which will have a .zip file download link (Download both the Presets and Profiles zip)
2. Open Lightroom and select an image.
3. Click on File -> Import Profiles and Presets in the header menu.
4. Navigate to where you saved the downloaded presets and select the two .zip files.
That’s it! All Presets are ready to be used. You will find them in the Editing pane section on the right.
lightroom mobile
installation guide
Installing presets in Lightroom Mobile
If you have an Adobe Cloud Subscription (such as the Adobe Photography plan) then installing presets on Lightroom Mobile is really easy.
All you need to do is install the presets in the Lightroom CC desktop application first as described above. It is important that you use the Lightroom CC and not the Lightroom Classic application. After installing the presets there, they will automatically be synced to your mobile device via the cloud, ready to be applied to your photos.
If you don’t have an Adobe Cloud subscription, you can still use the presets in Lightroom Mobile, however, the installation method is just a bit more involved. I recommend checking out this article by photographer Kevin Krautgartner and reading the section on Lightroom Mobile installation.
photoshop camera raw
installation guide
Installing presets in Adobe Camera Raw or Photoshop on Mac or Windows
The following instructions will guide you through the installation for Adobe Camera Raw/ Photoshop
1. Download your purchased Presets from the confirmation email which will have a .zip file download link (Download both the Presets and Profiles zip)
2. Open Adobe Photoshop and open any RAW image file. This will automatically open up the Camera Raw window.
3. In Camera Raw select the presets panel on the right. Click the three little dots and click on Import Profiles and Presets in the pop-up menu.
4. Navigate to where you saved the downloaded presets and select the JG Cine Presets zip file. Repeat this again and select the JG Profiles zip file instead.
That’s it! All Presets are ready to be used. You will find them in the presets pane in Camera Raw, ready to be applied.

white balance
tips on selecting white balance
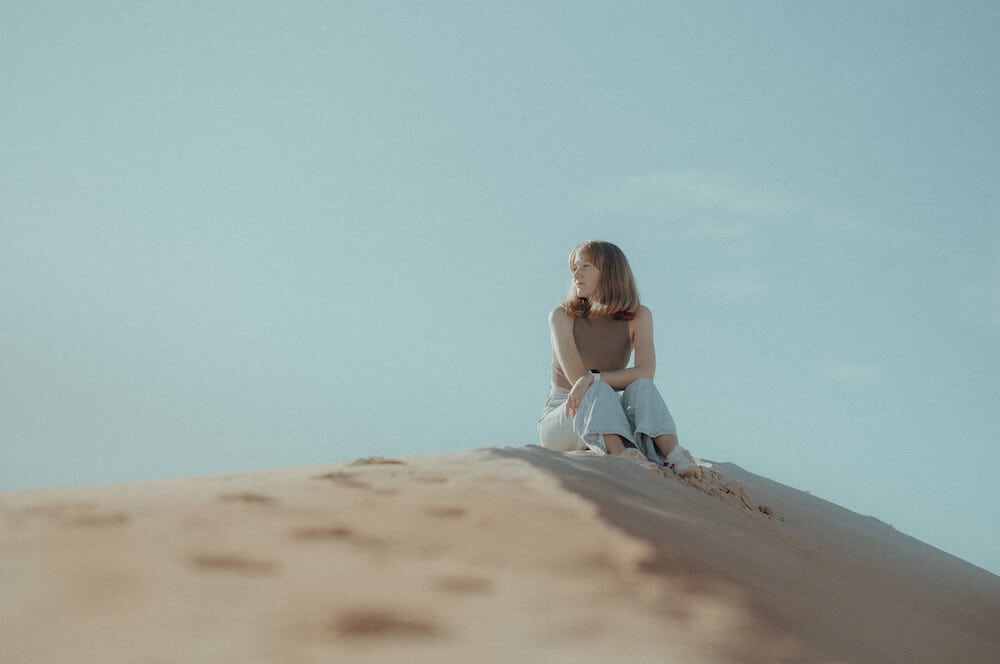
Once you apply one of the cinematic presets to your photo, you might notice that the white balance doesn’t seem right. That’s because every shooting environment is different and a preset might not work straight away but will need some tweaking.
White balance is one of the first things to adjust.This determines how warm (yellowish) or how cold (blueish) your photo looks. It all depends on how you want the image to look and feel.
A good rule of thumb is to look at the skin tones of any human appearing in your photos (assuming you have a person in your shot). If their skin doesn’t look natural then most likely the white balance needs tweaking.
Move the Temperature and Tint sliders around until you find a good balance and the look you are going for. A helpful tool is to click the eye dropper icon next to the white balance sliders and then select any area in the photo that you know should be grey or neutral. This will automatically shift the white balance to a more mathematically correct value. (But you don’t have to use it if you prefer to warm or cool the photo).
Personally, I prefer a warmer and browner look to the colours and so I will generally push the temperature slider towards yellow a little more.
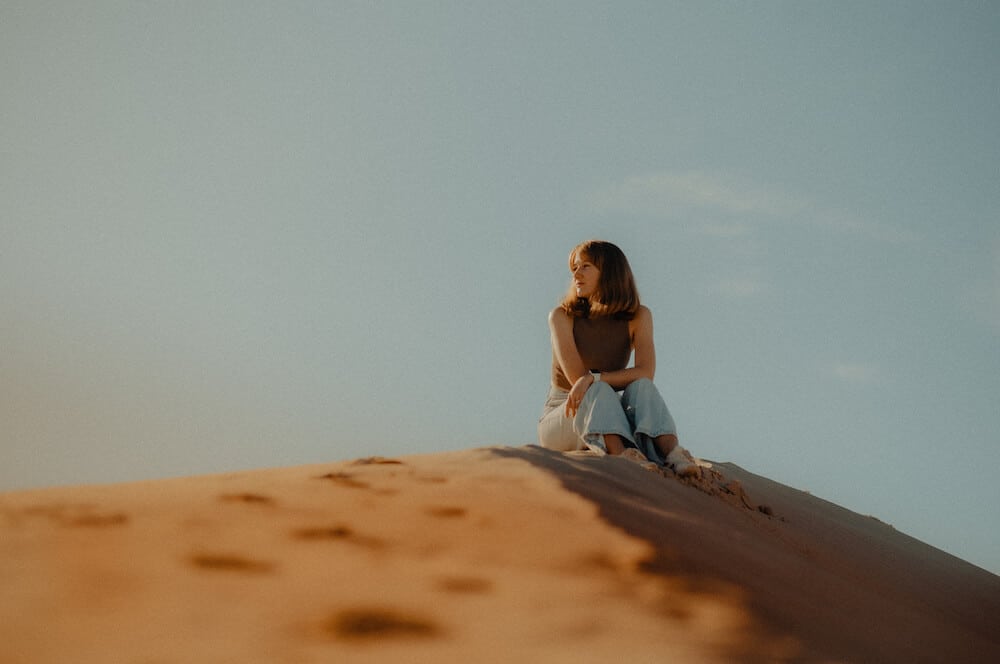
Have a look below at an example of a too-blue image compared to one that used the eye dropper tool to choose the right white balance for the subjects skin tone.


Photo courtesy of Signature Edits
highlights & shadows
tips on editing image exposure
Every photo is taken in different lighting conditions and so when applying the presets the exposure might not fit perfectly. It could be overly bright or too dark.
So the best thing to do is to play around with the Light dials of Exposure, Contrast, Highlights, Shadows, Whites and Blacks.
These all affect different tonal parts of a photograph. Generally, when an image is captured in bright outdoor locations or in dark indoor environments I like to reduce the Contrast slider far to the left. This brings back a lot of the colours in bright and dark spots.
Another helpful tweak is to bring down highlights and push up the shadows to try and bring back as much dynamic range as possible.
Lastly I push down the Blacks slider to bring some contrast back into the photograph.
See below for an example of an image using the JG Cine 7 preset before it has the Light tweaks applied.

profiles
using camera colour profiles
One of the best ways to affect the overall colour tones and grade them with the tints you want in the image is through camera colour profiles. The Preset pack comes with 5 profiles that once installed will add that move-like grade of cinematic teal and orange to the shadows and highlights of your photo.
The profiles are automatically applied when you select one of the JG Cine Presets. However, you can swap them or even change how strong the effect is in the Profiles panel of Lightroom or Camera Raw.
All you need to do is go to the editing window and at the very top, select the desired profile and change the amount slider to how much you want the look applied. Feel free to mix and match profiles between presets for the style you want.

grain
adding film grain overlay
Film grain helps remove that “plastic” look to photographs and simulates the texture of real photochemically processed film stocks, much like the texture you will see subtly applied to movies.
The JG Cine pack includes 2 Grain Presets. One is a low amount of grain and the other a stronger version. You can apply the grain presets to any photo to give it that textured, vintage film look.

cropping
cinematic aspect ratios
One of the biggest edits you can make to your photos to be more cinematic is the crop. Movies typically are shot in widescreen and you can create this same framing (or aspect ratio) by using the cropping tool.
Select the cropping tool in Lightroom or Camera Raw.
There are two common aspect ratios you can use: either 16 x 9 which is the default widescreen size for most displays,
or enter a custom value for the anamorphic (which is the super wide cinematic framing) size of 2,39 x 1
Then move your image around until you get the placement you like.

That’s all there is to it.