How to Shoot Film-Style Photos on Your iPhone
In this section, you’ll learn the practical tips and tools I use to shoot film style photos on iPhone. From choosing the right shooting app and format, to creative choices like adding intentional blur, using flash, and composing images with that nostalgic analog feel.
In this section:
Camera Apps
What to Shoot with
Exposure
Breaking the “Perfect” Rules
Focus
When Sharp Isn’t the Goal
Movement
Making Stills Feel Alive
Composition
Embrace the Rules – Then Break Them
Flash
Harsh Light, Bold Vibes


Camera Apps
Let’s start with the simplest (and best) tool you already have: the built-in iPhone Camera app.
It’s free, fast, familiar, and surprisingly powerful when you know what to do with it. While there are plenty of fun apps out there that mimic film aesthetics while you shoot (and I’ll list a few below), I prefer to capture the photo clean and unfiltered first. Then I give it that analog vibe in editing, which we’ll cover later in the guide.
My Current Shooting Workflow
Camera App: Stock iPhone Camera
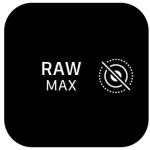
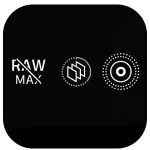
Shooting Format: I shoot in RAW, but only because I like having the full-quality file for flexibility in the future.
If you’re not editing heavily, JPEG or HEIC is perfectly fine, in fact, it fits the film vibe better in some ways: less precision, more personality.
You can change this by tapping the format icon in the top-right corner of the camera interface (on newer iPhones).
Aspect Ratio:
I shoot in 4:3, which is the iPhone’s native aspect ratio and also close to the classic dimensions of 35mm film. It gives the most authentic framing while still being versatile for crops later on but you can shoot in whatever size you like. This can be changed in the settings row at the bottom of the camera app.

Optional Film-Inspired Camera Apps
If you want a point-and-shoot film camera feel right from the start, these apps are worth exploring:
• Mood.Camera – Rich film simulations, minimalist interface
• 1998 Cam – Classic disposable-camera vibes with built-in effects
• Not Boring Camera – Fun, quirky, and full of nostalgic charm
These are great if you love the idea of capturing something that already looks like it came out of a shoebox of old prints. But personally, I find the most authentic and flexible results come from shooting clean and adding the mood later.
So for the rest of this guide, I’ll walk you through shooting on the stock camera app, because it’s simple, accessible, and gets you closer to that feeling of carrying a pocket film camera wherever you go.
Exposure: Breaking the “Perfect” Rules
One of the things I love about real film is how unpredictable it can be. You don’t always know if you’ve nailed the exposure until it’s developed, and honestly, that’s part of the charm. Sometimes the highlights are blown out, or the shadows are crushed, and yet, it works. It gives the photo mood, depth, and character.
With your iPhone, the camera is constantly trying to find the “perfect” balance, automatically adjusting exposure to make everything look even. But film-style photography isn’t always about perfect, it’s about feel.
That’s why it’s important to manually adjust your exposure when shooting. Want a bright, dreamy look? Slightly overexpose your shot. Want a more dramatic shot, especially in skies or bright scenes? Underexpose just a bit to keep those highlights in check.
![]()
The built-in iPhone Camera app lets you do this easily. Just tap to focus, then slide your finger up or down on the exposure icon to control the level. It only takes a second, but it can completely change the vibe of your photo.
The goal here isn’t technical perfection, it’s emotional impact. Don’t be afraid to play with exposure until your photo feels right.

Overexposed for a contrasted, outline effect

Underexposed for a dramatic, silhouette effect
Focusing: When Sharp Isn’t the Goal


A beautiful quirk of shooting on film is never really knowing if you nailed the focus. Sometimes it’s spot-on. Other times, it’s almost there, or completely missed. But often, that “mistake” is what makes the photo feel real and full of soul.
Soft focus, missed focus, background focus, these can all be powerful tools for telling a story. Sometimes letting the background stay sharp while your subject softly blurs into it gives the image a feeling of memory or dreaminess. It draws attention to the setting or mood, not just the person.
On your iPhone, you can recreate this by manually choosing where to focus. Just tap the screen on the background or foreground instead of your subject. It shifts the emphasis and gives your image that raw, artistic, film-like quality.
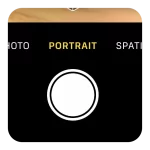
If you’re using a newer iPhone that supports Portrait Mode that’s even better. Adjust the aperture to control the level of blur. I usually keep mine around f/3.4 to f/4, just enough to create separation without looking artificial.
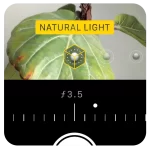
Intentional blur can feel risky at first, but don’t be afraid to lean into it. The sharpest image isn’t always the most meaningful.
(P.S. This effect can also be “faked” in the editing section. More on that to come later on.)
💡 Pro Tip: If your iPhone has multiple lenses, try using the telephoto (5x zoom) lens. Not only does it help isolate your subject, but it also compresses the background, creating a more cinematic look and deeper-feeling blur, similar to what you’d get on a film camera with a longer lens.
Movement & Slow Shutter: Making Stills Feel Alive
Another magical thing about film photography is how it captures movement. A bit of blur, a streak of light, a sense of motion, it gives the photo energy. It’s not about freezing time perfectly; it’s about freezing a feeling. That blur? It tells a story. It says, “this happened fast,” or “this moment was fleeting.”
There are two ways to achieve this on iPhone.
The first is by using the live photo mode in the default camera app.
1. In the stock camera app, turn on live photo mode in the top right.
2. Frame your shot and take a photo of a moving subject.
3. Go to the Photos app and select your photo. On the top left, tap on the Live dropdown and select Long Exposure. This will merge the Live Photo with a blurred image of the captured motion, recreating that sense of movement.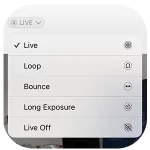
The second way to recreate this look on an iPhone, you’ll need a little help from a handy app: Pro Camera by Moment.

This app has a Slow Shutter mode that emulates the motion blur effect beautifully. Here’s how to use it:
1. Open the app and tap the icon on the bottom right to change camera modes.
2. Select Slow Shutter.
3. Frame your shot and press the shutter to begin the exposure.
4. Wait around 1.5 to 2 seconds (or longer if you want more blur), then tap again to stop.
During that time, slightly move your phone or capture a subject that’s in motion, like a car speeding by, someone walking, or kids playing. The movement creates natural streaks and softness, giving that dreamy motion-filled effect. It may take a few tries to get one you love, but when it hits, it really hits.
💡 Pro Tip: This effect works best when either you move the phone or your subject is in motion. For example, if someone’s riding a bike or tossing their hair in the wind, perfect shot for motion blur.
P.S. We’ll enhance this even more in the editing section, but capturing a strong base image is step one.


Composition: Embrace the Rules-
Then Break Them
Composition is the backbone of any good photo. You’ve probably heard the usual tips:
Rule of thirds, leading lines, negative space, symmetry, they all work, and they totally apply here too. They’re great tools to guide the viewer’s eye and create a well-balanced image. And when you’re shooting film-style photos on your iPhone, you can absolutely lean on these principles to get beautiful results.
But here’s the fun part: film doesn’t always follow the rules.
In fact, part of its charm is in how raw, off-kilter, and imperfect it can feel. Some of the best shots come from happy accidents, messy framing, or bold choices that would make a photography traditionalist squirm.
Here are a few “rule-breakers” to try on purpose:
• Tilt the Frame: Slightly angle your phone to create tension, movement, or a casual snapshot vibe.
• Dead-Center Subjects: Go against the rule of thirds and place your subject smack in the middle. It can feel bold, symmetrical, or even awkward in a good way.
• Crop Without Apology: Cut off heads, arms, or the “main” subject. It forces the viewer to engage more deeply and adds an editorial or mysterious feel.
• Let the Light Leak In: Position the camera toward the sun to get real lens flares, or just embrace any natural glow or haze. It adds character, even if it’s technically a “mistake.” In the editing section, we will cover how you can add this with an app.
• Negative Space, Cranked Up: Make your subject tiny in a big open space. It creates feelings of loneliness, calm, or scale that a tightly framed shot just can’t deliver.
💡Bonus Tip: Shoot for the Light
While golden hour (sunrise and sunset) is famously gorgeous, don’t sleep on midday light, especially for film-style shots. The harsh, overhead sun creates flat, blown-out images with faded tones and soft contrast, which weirdly look amazing in this context. What might feel too bright or unflattering in digital can feel warm and nostalgic in film.


Using Flash: Harsh Light, Bold Vibes
One of the most underrated tools in your iPhone camera is also one of the most iconic in film photography: the flash.
In the era of analog cameras, direct flash wasn’t just practical, it was a look. Harsh lighting, strong shadows, and blown-out highlights gave photos an honest, unfiltered edge. Every detail of the subject popped, and there was no hiding from the spotlight. It’s bold, dramatic, and surprisingly nostalgic.
This style has made a huge comeback, especially at events like weddings and parties, where flash is used to freeze real, candid moments, capturing people mid-laugh, dancing, or lost in the crowd. The result? Raw energy, retro vibes, and a photo that feels like it could’ve come straight from a disposable camera in the early 2000s.
💡 How to Do It
It’s easy:
• Open your iPhone camera
• Long press on the flash icon (⚡)
• Set it to On (not Auto)
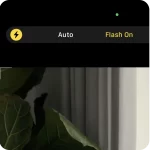
This forces the flash to fire, even in well-lit scenes. It works best in dim or nighttime environments, where the flash lights up the subject and lets the background fall into shadow. That contrast is part of the charm.
Don’t overthink it. Just point, flash, and shoot. You’ll be surprised how quickly it creates that vintage “caught in the moment” look, bright, honest, and a little chaotic in the best way.


Support the Guide
Pocketfilm is a free resource made purely out of a love for photography and creativity. If it’s helped you in any way, sparked a new idea, improved your iPhone shots, or simply brought back that nostalgic film feeling, and you’d like to say thanks, you can leave a small tip. It helps cover the time and tools that go into creating guides like this (and maybe the occasional coffee too).
No pressure. No subscriptions. Just a little creative fuel if you feel like it.
If you’re enjoying this guide, there’s more on the way.
I’m currently working on a new resource that dives into how to capture film-style video on your phone, cinematic, moody, and full of character. Think grainy slow-motion, nostalgic lighting, and handheld moments that feel like scenes from a movie.
Sign up below and I’ll send you an email when it’s ready (along with any other free tools, tips, or updates I think you’ll love).
No spam. Just honest, helpful stuff, when it’s worth sharing.
Follow @pocketfilm.gram on Instagram for more film-style inspiration.